Although it’s not the most difficult yard task, laying down grass sod to repair or start a lawn is labor-intensive and requires more knowledge than just “green side up.”
Don’t be discouraged. Sod can be a cost-effective way to transform a barren or barren area of your yard into a lush, green lawn. In six easy steps, you can lay sod.
Prepare your soil
You should start shopping for sod if you plan to lay sod. Don’t. Don’t. Preparation is key to a lawn that looks great. Preparing the soil will take more time than laying the sod. Don’t wait to buy your sod. Do the preparation work first.
You can’t lay new sod if the reason you are doing this is because your old lawn has died. There is an extra step that you have to take that other people don’t. You need to figure out what went wrong last time, so it doesn’t happen again.
There are a few things you need to do before buying any new sod.
Put on your detective’s cap. Let’s find out what went wrong in the past so that we can prevent it from happening again.
Common reasons for lawn failure
Grubbs stated that there are three main reasons lawns fail:
- Too much shade.
- Too much water or too little?
- Poor mowing practices include mowing too high or too low, and using poor equipment such as a dull or contaminated mower blade.
- Compaction of the soil.
- Poor selection of turfgrass
These notable problems can be solved:
Assess your lawn and determine how much sunlight it gets. What amount of sunlight will your lawn get? Will it be able grow well?
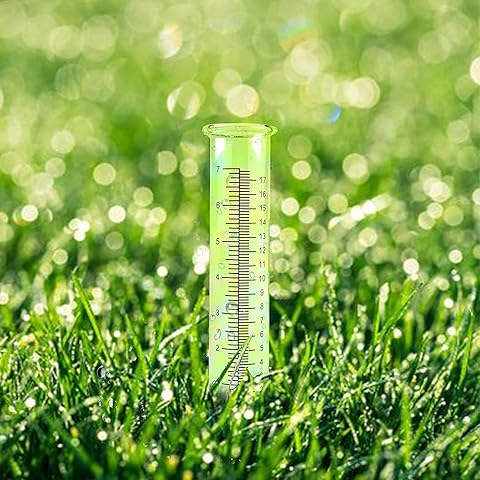
Check your irrigation system. In-ground systems should be inspected closely.
Do one or more soil testing. This will help you to determine what your soil needs so that you can purchase the correct fertilizer and amendments. Most soil test kits will require you to take soil samples from your entire yard and mix them.
If your lawn has failed, you should consider performing multiple lawn tests. Your front lawn might have different problems than your back lawn.
Follow the instructions once you have received the soil test results. You can adjust the soil pH level or add nutrients according to the test results.
Use a soil probe to check how much loamy topsoil is in your soil. Topdressing is a way to add organic matter and compost to thin soil layers.
Do not ignore the old sod
If you find a tiny, pitiful remnant of your lawn, remove it from its misery. You can use a flat shovel to do the job.
Chemical methods of removal are an option, but be careful.
Glyphosate products, for instance, are extremely effective and inexpensive. This broad-spectrum herbicide, which has been sold for many years under the name Roundup is now approved by all regulatory agencies around the world.
It’s now controversial because of concerns about its toxicity and possible links to cancer. Manufacturers have developed glyphosate substitutes since the controversy.
Alternately you could also rototill a leftover lawn into dirt using a rototiller. Make sure to mark the locations for sprinkler heads first.
This is not always a good idea. It’s possible to spread many weed seeds and live roots under your new lawn, which could be a distraction your grass doesn’t need since it’s just getting established. Even if the old grass hasn’t been killed, it can interfere with the growth of your new lawn.
Grubbs stated that each situation is different and will determine what you should do. It will depend on the soil test, the amount of grass left on the soil, and your ability to properly till it in.
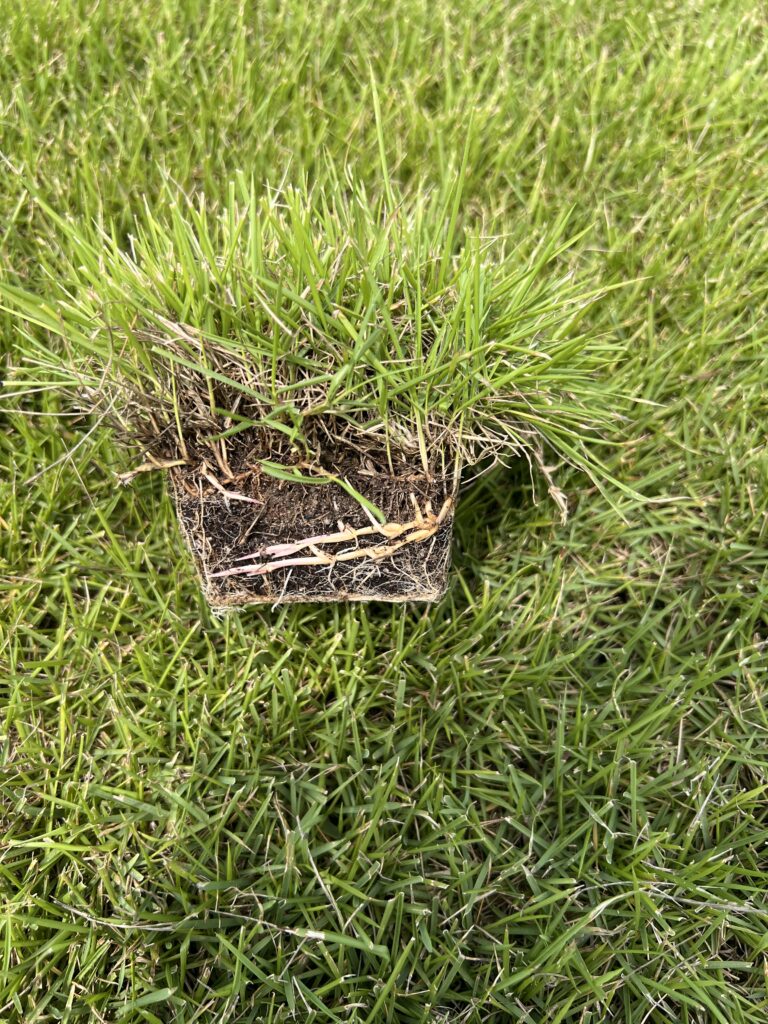
You don’t want to put new sod on top of old. “Sod should never be installed over existing grass.
To establish roots, soil must contact soil. Many people ask me if it is possible to just cover the grass with soil and then add sod. The short answer is “no.”
This will create air pockets and uneven ground settlement, which in turn will inhibit new root establishment. It will also create a situation that allows the old grass to compete against the new.
Sod cutters can be used to cut the grass in large areas. They are both efficient and less labor-intensive. You can rent a sod cutter from professional landscapers or do-it yourselfers.
Till the soil
You can decide whether to trim the lawn or keep it. The next step is to till the soil. The grass can become compacted over years, particularly in areas with clay soils. Tilling removes the soil so that the roots of the new lawn can reach deeper into the soil.
The soil can be fertilized under or on top of sod after it has been laid.
Check how much topsoil is available. Although sod can grow in all soil types, it will thrive best when you have loamy soil that is neither too clay-ey nor too sandy.
Fertilize responsibly. Water pollution is caused by fertilizers, especially starter fertilizers that can be used to fertilize new lawns. You can sweep up any excess fertilizer from paved areas, and then put it back on the ground. Do not flush it down the drain.
You can’t apply fertilizer with phosphorus in many states, except for new lawns. 25 states have placed restrictions on the use of this common fertilizer chemical due to its water-pollution.
Remember to level your soil. Your mowing will be more difficult if you leave hills or valleys in your soil. Be especially careful around curbs and sidewalks. To lower the soil by an inch or more, use a shovel or rake. Concrete will dry out sod that is too high above the soil.
Get your sod
Sod can only last for a couple of hours to a few weeks depending on what grass is used and how the weather. Sod grows best when purchased in rolls. The heat generated during the process can cause the roll to be destroyed from the middle.
SOD is only guaranteed if it is installed within 24 hours of delivery. It is vital for the health of your lawn that you lay it right away. You risk sod drying out and the interior slabs or rolls heating up if you don’t. On hot days, the grass will begin to decompose and compost. Before you get sod delivered to your house or job site, make sure it is properly prepared.
Find out the area of your lawn in feet. Prices are usually quoted per square foot or per pallet. Although a pallet covers approximately 450 square feet, there are many variations. It is easiest to get a comparison of the cost per square foot.
- Some pallets are cut into strips measuring 16 by 24 inches, particularly for Southern grasses. Each piece covers 2.66 acres.
- Grass rolls typically consist of strips of sod measuring 2 feet by 5ft. This covers 10 square feet.
In 2019, grass sod prices range from $0.30 to $0.80 per sq. ft, depending on which sod farm is used and what grass type it is. Prices for sod installation range from $1.20 to 1.80 per square foot. Spot checks of pallet prices across the country revealed a range between $115 and $230 per pallet with delivery fees extra.
These prices could mean that a 1,000-square-foot yard of sod can be as low as $300 for a DIYer and as high as $1,800 for an installed patch.
Sod is more expensive than grass seed. A bag covering 1,000 square feet can cost as low as $30. However, it is much more difficult to plant a grass lawn using seed.
While local garden centers can be convenient and have the most common varieties, they may not carry the best grasses for your region. However, buying directly from a farm will give you more options and expert knowledge on grass types.
Step 5: Spread the sod
Now you are ready to plant the seed.
Pros have a few tips. They start with the realization that you work hard in your yard laying sod. Even on a mild spring day you will end up sweaty, hot and dirty.
- Don’t be afraid to wear loose, comfortable clothes.
- Get plenty of fluids.
- Make sure to wear sunscreen and a hat.
Place your sod lawn in thin strips. Start your first row with the longest straight, continuous edge.
Continue to lay straight lines. However, you should stagger the ends in a brick-like fashion so that you don’t have one continuous seam. This is more appealing aesthetically. Long seams encourage water to channel, making seams fall apart and exposed.
Laying sod over the entire area, make sure to cut pieces of sod in small, even pieces, and leave no gaps. Use a sharp knife or a razor to slice pieces of sod. This will fill in any gaps left by the brick pattern. You can also use the knife to cut around sprinkler heads or other irregular shapes. Any air pockets should be removed. Fill your lawn roller with one-third of the water.
You can also walk slowly and methodically across the soil with your feet close to each other. The goal is to get the new roots in contact with the topsoil.
Stakes are required for lawns with sloped areas. These staples are available at most garden centers and are very affordable.
Common errors in laying sod
- Do not buy sod too soon
- Overlapping sod.
- You should leave gaps between the sod.
- Ski slopes are not for the faint of heart.
- Don’t allow the soil to get too high near sidewalks or driveways. This will expose the edges.
- Too much or too little water.
Step 6: Fertilize and water your sod
If you don’t pay attention to your new plant’s water requirements, all that hard work is a waste.
It is important to water new turfgrass sod as soon as it is established.
During the initial period, water should be used sparingly but often. To encourage a lush, deeply rooted lawn, make sure the water is able to penetrate the sod pieces.
It is not your intention for it to dry out or remain saturated. To establish a green lawn, dry, mud, and moist are all bad.
You can check the soil by lifting the corners and re-watering as soon as it is dry. You should begin to see roots breaking through the top of the sod.
The sod will begin to resist your gentle tugging at the corners soon after. You can then stop watering. Instead, water the sod on a regular basis, but only to 6 inches deep. This encourages roots to grow. To avoid disease and evaporation, water early in the morning.
Gibson advised that you don’t mow too fast on your newly-constructed turf. Your ground will initially be spongy due to all the water. Therefore, walking on it and mowing will create divots or trenches.
You can start to mow your yard once the new lawn is 3-4 inches high. You should avoid ripping out tender roots. Either you or your lawn professional should instruct the mower to turn on pavement instead of the grass. The “one-third rule” states that you should not mow more than one third of your lawn’s height in one mowing. To encourage strong roots, mowing tall is a good idea.